
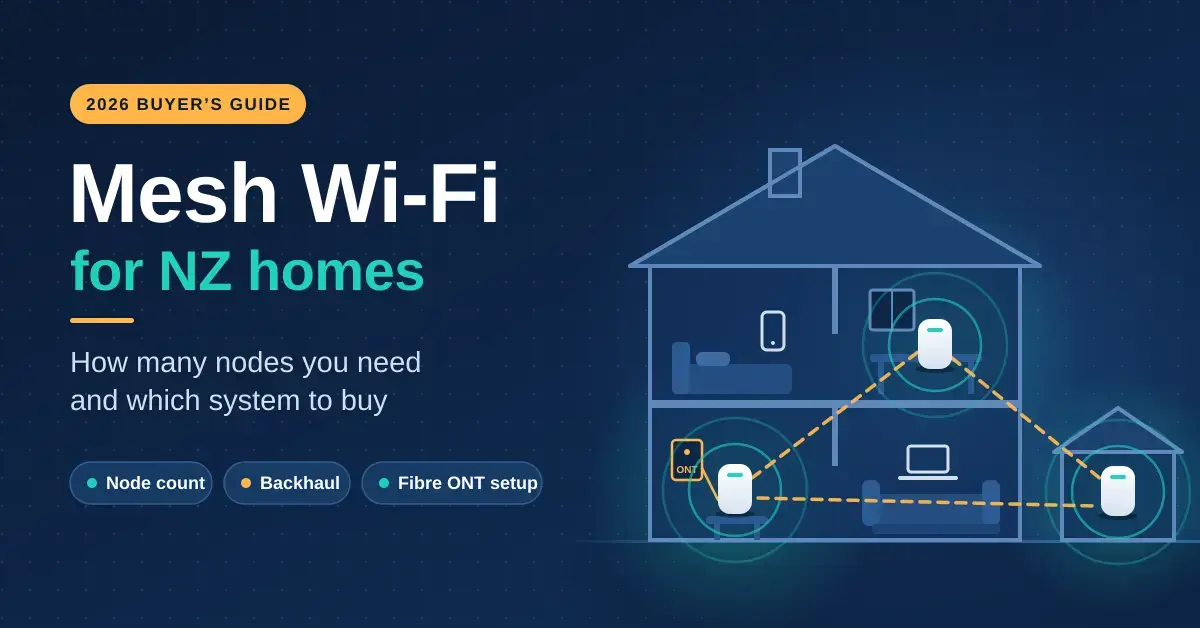
Mesh Wi-Fi replaces the single router-in-the-corner with two or more nodes that share one network name and hand your devices between them as you move through the house. For most New Zealand homes over roughly 150 m², or anything on two levels, it is the fix that actually clears dead zones. This guide explains how many nodes a Kiwi home really needs, why the connection between the nodes matters more than the speed rating on the box, which generation to buy in 2026, and how to set it up behind a fibre ONT without breaking your home phone or your gaming.
If your problem is one weak room rather than a whole wing, start with our Wi-Fi extender guide, and if you are still running the router your ISP posted out, our modem router guide covers what fibre, Hyperfibre and VDSL connections really need before you spend anything on mesh.
Key Takeaways
- Two nodes cover most single-storey NZ homes up to about 250 m²; add one per extra storey or wing, and one for a sleepout or garage.
- Backhaul decides real speed. Dual-band mesh loses roughly half its throughput at each wireless hop; a tri-band system or an Ethernet cable between nodes fixes that.
- Wi-Fi 6 dual-band mesh (a 2-pack is about NZ$300–$450) is enough for Fibre 300 and most Fibre Max homes. Wi-Fi 7 systems with 2.5 Gbps ports only pay off on Hyperfibre or with wired backhaul.
- New Zealand allows Wi-Fi 6E and 7 on the lower 6 GHz band only (5925–6425 MHz), so a tri-band system gets one wide channel here, which is fine for a home.
- Run the mesh in access-point mode behind your ISP router, or bridge the ISP router. Two devices doing NAT at once causes odd faults with gaming, cameras and VoIP.
What Mesh Wi-Fi Does Differently
Mesh Wi-Fi spreads one seamless network across several nodes and steers each device to the best one automatically. A normal router broadcasts from a single spot, and signal strength falls away with every wall between it and your phone. A Wi-Fi extender rebroadcasts that already-weakened signal, usually under a second network name, so you end up managing two networks and your devices cling to the wrong one. A mesh system instead runs one name across every node, uses a management protocol to steer clients to the strongest node, and hands you over as you walk from the lounge to the sleepout. Everything is controlled from one app, and adding coverage later is just a matter of buying another matching node.
This is different from device-to-device features such as Wi-Fi Direct, which links two gadgets directly (a phone to a printer, say) rather than extending your home network. Mesh is about whole-home coverage from one internet connection, not point-to-point links between devices.
The catch is that each node still has to get data back to the node plugged into your fibre ONT (the small box on the wall where the fibre terminates). That connection is called backhaul, and it is the single biggest factor in whether a mesh system feels fast. Everything else, including the AX3000 or BE11000 speed ratings printed on the box, matters far less. If you want the underlying basics first, our explainer on how Wi-Fi actually works covers bands, channels and why your connection drags.
How Many Mesh Nodes Does an NZ Home Need?
Most single-storey New Zealand homes need two nodes, and most two-storey homes need two or three. Manufacturers quote coverage per node, usually 150–230 m², but those figures assume open-plan spaces with easy walls. NZ housing varies enormously: a 1970s weatherboard house with Gib linings is easy for Wi-Fi, while brick veneer, concrete block, foil-backed insulation, a long-run steel roof and even a large heat-pump head unit all eat signal. A long, narrow villa needs nodes spread along its length; a compact two-storey townhouse usually wants one node per floor, stacked roughly above each other.
| Home type | Nodes | Notes |
|---|---|---|
| Apartment or unit up to 120 m² | 1–2 | A good single router often suffices; a 2-pack if the ONT sits at one end |
| Single-storey house 120–250 m² | 2 | Main node near the ONT, second node about halfway to the far rooms |
| Single-storey over 250 m² or L-shaped | 3 | One per wing; wired backhaul if the house is long |
| Two-storey house | 2–3 | One per floor; a third for a far end or upstairs office |
| House plus sleepout, garage or office | +1 per building | Outdoor-rated node or a buried Ethernet run |
| Rural property on Starlink | 2–3 | Starlink’s router covers the house core; mesh nodes wired to it cover the rest |
Lean towards fewer, better-placed nodes. Too many nodes on wireless backhaul creates its own congestion, because they all compete for the same air time. If you are wiring the house anyway, a single Ethernet run beats a third wireless node every time; our home network setup guide shows how to plan cable points room by room.
Wired vs Wireless Backhaul
Backhaul is how each node talks back to the main node, and it decides your real-world speed. On a dual-band mesh system, the 5 GHz radio does two jobs at once: it serves your devices and it carries traffic back to the main node. A radio cannot transmit and receive at the same instant, so each wireless hop roughly halves the throughput available at that node. Two hops and the far node is working with about a quarter of your plan speed. Tri-band systems add a second 5 GHz or a 6 GHz radio reserved for backhaul, which is why they cost more and why they are the right choice for three or more nodes without cables.
Ethernet backhaul is the upgrade nobody regrets. Almost every mesh system, including budget ones, will use a cable between nodes automatically the moment it finds one. A single Cat6 run from the main node to the far end of the house, through the ceiling or under the floor, turns a wireless dead zone into a second full-speed access point. If you are renovating, put a network point in every room while the walls are open: our Ethernet cable guide explains why Cat6 is the sensible pick for a home, and a small network switch lets one cable run feed several wired devices at the far end.
No Cable? Powerline Is the Fallback, Not the First Choice
Powerline backhaul sends network data over your home’s electrical wiring, and it is a reasonable last resort when wireless hops fail and you cannot pull a cable. Some Deco models bundle powerline (G.hn) backhaul, and any mesh node can be fed by a separate powerline adapter plugged into a nearby socket. It works, but the speed depends heavily on your house wiring, the age of the switchboard and how many circuits the signal has to cross, so test it before you rely on it. Our powerline adapter guide sets out what to realistically expect in NZ homes.
Wi-Fi 6, 6E or 7: What to Buy in 2026
Wi-Fi 6 systems are the value buy in 2026, and Wi-Fi 7 only earns its price on Hyperfibre or with wired 2.5 Gbps backhaul. Wi-Fi 6 (802.11ax) is dual-band, mature and cheap. Wi-Fi 6E adds the 6 GHz band as a clean third lane. Wi-Fi 7 (802.11be), certified by the Wi-Fi Alliance in January 2024, adds wider 320 MHz channels on 6 GHz and Multi-Link Operation, which lets a capable device use two bands at once.
New Zealand only opened the lower slice of the 6 GHz band. Radio Spectrum Management made 5925–6425 MHz available for indoor Wi-Fi from August 2022 and has not yet released the upper 6425–7125 MHz portion; the official position is set out in the RSM outcomes on WLAN use in the 6 GHz band. In practice that gives 6E and Wi-Fi 7 systems one wide 320 MHz channel here rather than the three available in the United States. That is still plenty for a house, but it is worth remembering when you read glowing overseas reviews that assume far more 6 GHz spectrum than we have.
Match the ports to the plan, not just the radios. A gigabit Ethernet port tops out around 940 Mbps of real throughput, which is fine for Fibre 300 and Fibre Max. Chorus Hyperfibre plans (2000, 4000 and 8000 Mbps, symmetric) need 2.5 Gbps or 10 Gbps ports on the main node and on your computer to show any benefit, and even then a single Wi-Fi client rarely exceeds about 1.5 Gbps in the real world. Run our NZ speed test on a cabled laptop first, so you know what your connection actually delivers before you blame the Wi-Fi.
Mesh System Comparison
| Generation | Typical NZ price (Sept 2026) | Best for | Watch out for |
|---|---|---|---|
| Wi-Fi 6 dual-band (e.g. Deco X50 Pro, eero 6+) | 2-pack NZ$300–$450; 3-pack NZ$400–$600 | Fibre 300 and Fibre Max, two nodes, or any wired setup | Wireless backhaul shares the 5 GHz band with your devices |
| Wi-Fi 6 / 6E tri-band (e.g. Deco XE75, Orbi RBK76x, Nest Wifi Pro) | 3-pack NZ$650–$1,100 | Three or more nodes without cables; larger homes | 6 GHz backhaul has shorter range through walls |
| Wi-Fi 7 tri-band with 2.5G ports (e.g. Deco BE65, eero Pro 7) | 3-pack from about NZ$930 | Hyperfibre, wired backhaul at 2.5 Gbps, Wi-Fi 7 laptops and phones | Most devices in the house are still Wi-Fi 5 or 6 |
| Wi-Fi 7 quad-band flagships (e.g. Deco BE85, Orbi 970) | NZ$2,000+ | Large homes on Hyperfibre wanting 10 Gbps ports | Little benefit on a 1 Gbps plan |
Best Mesh Wi-Fi Systems for NZ Homes
These are the systems worth shortlisting for a New Zealand home in 2026, chosen on features, ports and price rather than marketing. Prices are what NZ retailers showed in September 2026 and they move weekly, so treat every figure as a guide, not a quote. TP-Link’s full Deco mesh range is the easiest to buy locally and mixes models within one network, which is why it appears more than once below.
Best Value: TP-Link Deco X50 Pro (Wi-Fi 6)
The Deco X50 Pro is an AX3000 dual-band system with two 2.5 Gbps auto-sensing ports per node, which is unusual at this price and makes it Hyperfibre-ready the moment you wire it. A 2-pack was about NZ$407 at PB Tech in September 2026, rated for four- to six-bedroom homes. The plain Deco X50 and older X20 are cheaper still and fine for Fibre 300 homes. The Deco app is simple, uses Ethernet backhaul automatically when it finds a cable, and mixes with other Deco models, so you can add a cheaper node later.
Best for Bigger Homes Without Cables: Tri-Band Wi-Fi 6E or 7
If you need three nodes and cannot pull a cable, buy a tri-band system with a dedicated backhaul radio. TP-Link’s Deco XE75 (Wi-Fi 6E) and Netgear’s Orbi RBK76x series are the established picks, and Google’s Nest Wifi Pro is the easiest to live with if you are already in the Google Home ecosystem. Check which band handles backhaul: a 6 GHz backhaul is faster but shorter-range through walls, so keep those nodes within one or two walls of each other, while a 5 GHz backhaul reaches further at lower peak speed.
Best for Hyperfibre: TP-Link Deco BE65 (Wi-Fi 7)
The Deco BE65 is a BE11000 tri-band Wi-Fi 7 system with multiple 2.5 Gbps ports per node, so a wired node can feed a 2.5 Gbps switch or a NAS at close to full speed. A 3-pack ranged from about NZ$930 at PB Tech to roughly NZ$1,250 at other retailers in September 2026, and for most houses a 2-pack is the smarter buy. Amazon’s eero Pro 7 and Netgear’s Orbi 770 are the main alternatives; the flagship Deco BE85 and Orbi 970 add 10 Gbps ports that only Hyperfibre 4000 and 8000 customers can actually use.
Best for Starlink and Rural Homes
Starlink’s own mesh nodes are the plug-and-play option, but any mesh system works if you put the Starlink router in bypass mode or run the mesh in access-point mode behind it. Because rural plans rarely exceed about 300 Mbps, a budget Wi-Fi 6 system is plenty here; spend the difference on an outdoor-rated node or a buried Ethernet run to the shed instead. Our Starlink Wi-Fi extender guide walks through the bypass-mode setup step by step.
Setting Up Mesh With Your ISP Router
On fibre, the Chorus or local fibre-company ONT on your wall is not a router; it needs a router behind it. That can be your mesh system’s main node, with no ISP router at all, as long as the mesh supports your ISP’s connection type. Most NZ fibre plans use a plain DHCP or PPPoE connection with a VLAN tag of 10 on the WAN port, and current Deco, eero, Orbi and ASUS systems all support VLAN tagging. If your ISP router also handles your home phone (VoIP), keep it as the router and run the mesh in access-point mode so the phone keeps working.
- Pick one router. Either replace the ISP router with the mesh main node, or set the mesh to access-point (bridge) mode. Never leave both devices routing at once.
- Turn off the old Wi-Fi. If the ISP router stays as the gateway, disable its Wi-Fi so devices do not cling to it.
- Reuse your old network name and password. Every device reconnects without you touching it.
- Place the satellites, then check the app. Most apps report backhaul signal quality per node; move a node until it reads good or strong.
- Update the firmware and set a guest network for visitors and cheap smart-home gadgets, keeping them off your main network.
Once it is running, the settings that make a genuine difference are covered in our router settings guide; most mesh apps hide the harmful options anyway, so there is little to break.
Where to Put the Nodes
Placement matters as much as the hardware. A node in the wrong spot cannot pass on a signal it never received cleanly. Follow a few rules and even a budget system performs well:
- Halfway, not in the dead zone. A satellite needs a good signal from the main node to relay. Put it where your phone still shows two or three bars, roughly midway to the problem room.
- Out in the open. Not in a cupboard, behind the TV or inside a metal cabinet. Waist height or higher on a shelf is ideal.
- Away from the kitchen. Microwaves, fridges and range hoods all interfere with 2.4 GHz and block 5 GHz.
- Stack the floors. In a two-storey home, place the upstairs node roughly above the downstairs one; timber floors pass signal well, concrete slabs do not.
- Keep the main node near the ONT on a short cable, and let the satellites do the spreading.
Common Mesh Wi-Fi Mistakes
Most mesh disappointments come from setup and placement, not the hardware. These are the errors we see most often in New Zealand homes.
- Running two routers at once. Leaving the ISP router routing while the mesh also routes creates a “double NAT” that breaks gaming, security cameras, VoIP and remote access in ways that are hard to diagnose. Pick one router and put the other in bridge or access-point mode.
- Chaining three dual-band nodes wirelessly. Each hop halves the speed, so the third node ends up on a quarter of your plan. If you need three or more nodes without cables, buy tri-band; if you can run one cable, a cheaper dual-band system is fine.
- Placing the satellite in the dead zone. A node parked in the weak room only rebroadcasts a weak signal. It belongs about halfway between the main node and the problem area.
- Buying for the box’s speed rating. A BE11000 label means nothing if every hop is wireless and your plan is 300 Mbps. Backhaul and placement decide real speed.
- Overspending on Wi-Fi 7 for old devices. If the phones, laptops and TVs in the house are still Wi-Fi 5 or 6, they cannot use Wi-Fi 7’s headline features, so the money is better spent on an extra node or a cable.
- Ignoring the ports. Feeding a Hyperfibre plan through gigabit ports caps you near 940 Mbps. If you pay for 2000 Mbps or more, the main node and the wired client both need 2.5 Gbps ports.
Because retail prices move constantly — much like the exchange rates you’ll see on finance trackers such as the XRP price in NZD — treat every dollar figure here as a September 2026 snapshot and check the retailer before you buy.
Prices are in NZ dollars incl. GST as seen at New Zealand retailers in September 2026 and change often. Coverage figures are manufacturer claims and vary with construction and layout. This article is general information for New Zealand households, not purchasing or technical advice for a specific installation. Nicegear is independent, earns no commission from these brands and runs no paid placements.
Sources
Frequently Asked Questions
Is mesh Wi-Fi better than a Wi-Fi extender?
For more than one weak room, yes. Mesh runs a single network with automatic handover between nodes, while an extender creates a separate network that devices often fail to switch to. An extender is still the cheaper fix for a single dead spot, but mesh is the better answer for whole-home coverage.
How many mesh nodes do I need for a two-storey house?
Usually two, one per floor, placed roughly above each other so the signal passes cleanly between levels. Add a third for a long house, a far-end home office, or where a concrete slab sits between the floors and blocks the signal.
Do I still need my ISP router with a mesh system?
On fibre, usually not: the mesh main node can plug straight into the ONT if it supports your ISP’s VLAN 10 tagging and connection type. Keep the ISP router only if it provides your home phone, and then run the mesh in access-point mode so both keep working.
Does mesh Wi-Fi slow down your internet?
Wireless backhaul on a dual-band system roughly halves the speed available at each satellite node. Tri-band systems with a dedicated backhaul radio lose far less, and Ethernet backhaul between nodes loses nothing at all.
Is Wi-Fi 7 worth it in New Zealand?
Only on Hyperfibre or with wired 2.5 Gbps backhaul. New Zealand has opened just the lower 6 GHz band, so Wi-Fi 7 gets one wide channel here, and most phones and laptops in a typical household are still Wi-Fi 5 or 6 and cannot use its headline features.