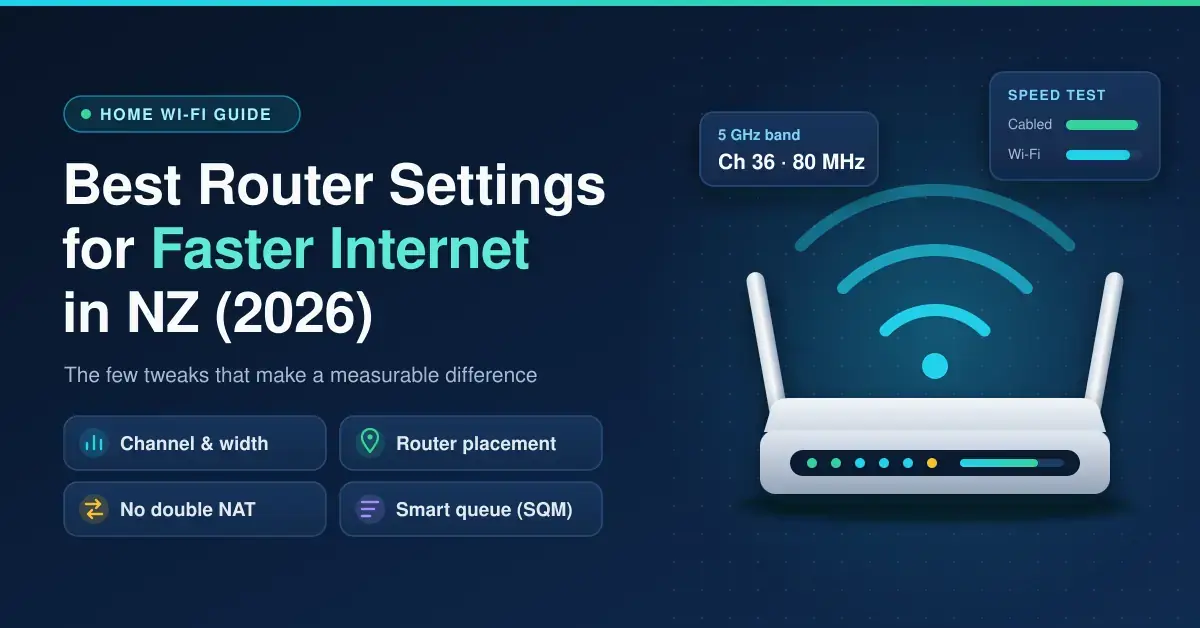
Most advice for speeding up home Wi-Fi is folklore. In practice only a handful of router settings make a measurable difference in New Zealand homes: the channel and width on each band, where the router physically sits, whether your ISP box and your own gear are quietly fighting over routing, and a correctly configured queue on connections that struggle when several people are online at once. Almost everything else, from renaming your network to flipping a “turbo” switch, changes nothing you can actually measure. This guide covers the settings worth ten minutes of your time, in the order to try them, and the ones you can safely leave alone.
Before you change a single thing, run our NZ speed test twice: once on a laptop plugged into the router with an Ethernet cable, and once on Wi-Fi in the room that feels slow. If the cabled result matches the plan you pay for, the connection itself is healthy and every problem below is a Wi-Fi problem. If the cabled result is also slow, the issue is the plan, the hardware or the ISP, and our modem router buying guide is the right place to start.
Key Points
- Set 2.4 GHz to 20 MHz width on channel 1, 6 or 11, and 5 GHz to 80 MHz on auto. This fixes more slow Wi-Fi than any other setting.
- Make sure only one device on your network is routing. Double NAT from an ISP router plus your own router causes lag, failed game connections and camera dropouts.
- Update the firmware and switch off WPS, remote management and UPnP unless something genuinely needs them — a compromised router is a slow router.
- Smart-queue QoS helps on Starlink, wireless broadband, VDSL and busy Fibre 300 homes; on Fibre Max it rarely matters, and a badly set QoS caps your speed.
- Placement beats settings. A router in a cupboard at one end of the house will be slow whatever you change, so test on a cable first to find your true speed.
Which router settings actually change your speed?
Only about five settings move the needle, and they are not the ones most “speed boost” articles push. In rough order of impact they are: the Wi-Fi channel and channel width on each band, making sure only one device on the network is routing (no double NAT), keeping the firmware current, turning off the risky features that slow a compromised router down, and adding a smart queue on connections that fill up. Placement sits above all of them — a router hidden in a metal cabinet at one end of the house will be slow no matter what you type into its settings page.
The reason so much advice fails is that it treats Wi-Fi speed and internet speed as the same thing. They are not. Your plan sets a ceiling; your router settings decide how much of that ceiling reaches each device. If you understand nothing else, understand that: settings can stop a router wasting capacity, but they can never create capacity the plan does not have. For the background on how the wireless side works, our plain-English guide to how Wi-Fi works fills in the gaps.
Bands, channels and width: the settings that matter most
Getting the bands and channels right fixes more slow Wi-Fi than any other change you can make. Every modern router broadcasts on 2.4 GHz and 5 GHz, and newer Wi-Fi 6E and Wi-Fi 7 units add 6 GHz. The 2.4 GHz band reaches further and pushes through more walls, but it is crowded: it has only three channels that do not overlap (1, 6 and 11) and it shares the airwaves with microwaves, Bluetooth, baby monitors, cordless phones and every neighbour’s smart plugs. The 5 GHz band is much faster and far roomier, but its range is shorter. The 6 GHz band is faster and almost empty today, at even shorter range. The two settings that matter on each band are which channel it uses and how wide that channel is.
On 2.4 GHz, lock the width to 20 MHz and pick channel 1, 6 or 11. A 40 MHz channel on 2.4 GHz swallows most of the band and makes interference worse for you and everyone nearby, so the extra width usually costs more speed than it gains. On 5 GHz, 80 MHz is the sweet spot for almost every home: fast, and narrow enough to coexist with the neighbours. The wider 160 MHz mode looks better on paper but collapses back to a narrower width the moment it detects interference, so it is only worth trying in a genuinely quiet street with Wi-Fi 6 or Wi-Fi 7 devices.
| Setting | Recommended value | Why it matters |
|---|---|---|
| 2.4 GHz channel | 1, 6 or 11 (whichever is least used near you) | The only non-overlapping set; “auto” often lands on a crowded middle channel that overlaps two others. |
| 2.4 GHz width | 20 MHz | 40 MHz overlaps almost the whole band and makes interference worse for the small speed gain it offers. |
| 5 GHz channel | Auto, or a DFS channel (52–64 or 100–144) in a crowded area | DFS channels are quieter because many consumer devices avoid them; NZ permits them for home use. |
| 5 GHz width | 80 MHz (160 MHz only in a quiet street) | 80 MHz is fast and neighbourly; 160 MHz drops back under interference and can be less stable. |
| Band steering / single SSID | On, one network name for both bands | Lets the router push capable devices onto 5 GHz automatically; split the names only if a smart device refuses to pair. |
| Transmit power | Maximum on a single router; lower on extra access points that sit close together | Reducing power only helps when access points overlap and devices cling to the wrong one. |
| Wi-Fi mode | Mixed (Wi-Fi 4/5/6/7), never “N only” or legacy | Legacy-only modes cripple new devices; mixed mode costs nothing measurable. |
Check the router’s country or region setting as well. Units imported from overseas may still run US or EU channel rules, which can leave channels blocked or set the wrong power limits. Set the region to New Zealand so the DFS ranges and the non-DFS 149–165 channels behave the way our rules allow. Those rules come from Radio Spectrum Management, and the plain summary of what any household may use without a paid licence is in the general user radio licences, including short-range devices, from Radio Spectrum Management NZ.
How do I find the least crowded channel?
Use a free Wi-Fi analyser app rather than guessing. On an Android phone, apps such as WiFiman or a Wi-Fi analyzer show every network around you, the channel each one uses and how strong it is; on a laptop, the same tools run on Windows, macOS and Linux. Stand in the room where you use the connection most, look at 2.4 GHz first, and choose whichever of channels 1, 6 and 11 has the fewest strong networks on it. Then look at 5 GHz and note which channels your neighbours are avoiding — in most streets the DFS channels between 100 and 144 sit almost empty because many cheaper routers skip them.
Set the channels manually rather than leaving them on auto. Auto selection tends to wander over time, and it often rechecks at the worst possible moment, dropping every device for a few seconds during a call or a game. Pick a good channel, lock it, then re-run the speed test in the slow room to confirm the change actually helped. If a 5 GHz DFS channel triggers a one-minute “radar check” when the router restarts, that is normal and only happens once.
One router only: how to fix double NAT
Double NAT is the single most common cause of gaming lag, camera dropouts and VoIP faults in New Zealand homes, and most people never notice they have it. It happens when two devices are both handing out addresses and translating traffic — typically an ISP-supplied router plus your own router or mesh system, each running its own network. Everything mostly works, which is why it goes unnoticed, but online consoles report a “strict” or “moderate” NAT type, security cameras and remote access need awkward workarounds, and every packet is translated twice for no benefit. Home routers do not need the layered routing that carriers run with enterprise protocols such as EIGRP; a household simply wants one device doing the routing and nothing behind it duplicating the job.
The fix depends on your setup:
- Your own router or mesh on fibre: remove the ISP router entirely and connect your own gear straight to the ONT (the small fibre box on the wall) using your ISP’s settings, usually VLAN 10 with DHCP or PPPoE.
- The ISP router has to stay (for a home phone line or on wireless broadband): set your own router or mesh to access point or bridge mode so the ISP box does all the routing and yours just serves Wi-Fi.
- Starlink: turn on bypass mode in the Starlink app and plug your own router into the Ethernet adapter, so the Starlink router stops routing.
To check whether you have double NAT, open your router’s status page and look at its WAN or internet address. If it begins with 192.168, 10. or anything from 172.16 to 172.31, another router is sitting in front of it. Our home network setup guide walks through the clean single-router layout step by step.
Should you turn on QoS?
Quality of Service (QoS) only helps when the connection genuinely fills up, so most people should leave it off. QoS tells the router which traffic to send first when there is not enough capacity to go around, which is exactly what a Fibre 300 household needs when someone uploads a big file during a video call, or what a Starlink, 4G or VDSL line needs because their upload speeds are modest. On a Fibre Max or Hyperfibre plan the pipe is rarely full, and the stutter you feel there is almost always Wi-Fi congestion, not the connection — so QoS does nothing useful and a badly configured one can even cap your speed. Our QoS explainer goes deeper; the short version is below.
- Prefer smart-queue QoS if your router offers it. Look for SQM, fq_codel or CAKE — ASUS Adaptive QoS, TP-Link HomeShield QoS and OpenWrt’s SQM package all belong to this family. Set the upload and download limits to about 90–95 percent of the speed you measured on a cable, so the router keeps just enough headroom to control the queue. The community that developed these tools explains the problem they solve, latency under load, at what can I do about bufferbloat (SQM, fq_codel and CAKE) on Bufferbloat.net, and the step-by-step configuration lives in the Smart Queue Management (SQM) OpenWrt documentation.
- Do not enable heavy QoS on a gigabit plan with a cheap router. Many budget routers can only shape traffic in software, which caps throughput at a few hundred Mbps — so the feature meant to help ends up throttling you.
- Prioritise by device, not by app, if the router lets you. Put the work laptop and the console at the top and the TVs at the bottom; that is simpler and more reliable than trying to tag individual apps.
DNS, IPv6 and MTU
A slow DNS resolver makes every website feel sluggish even on a fast plan, because your device has to look up a name before it can load anything. DNS is the internet’s address book: it turns a name such as nicegear.co.nz into the numeric address your device actually connects to. Your ISP’s resolvers are usually fine, but if you notice a pause before pages start to load, set a public resolver in the router’s WAN settings so every device on the network benefits at once. Two safe, fast choices both run servers in Auckland, so lookups stay local: Cloudflare on 1.1.1.1, explained at what is 1.1.1.1 from Cloudflare, and Quad9 public DNS on 9.9.9.9, which also blocks known malicious domains. Because both have New Zealand points of presence, they also avoid the odd region errors some streaming services throw when a resolver appears to be overseas.
Turn IPv6 on if your router has the option and your ISP supports it, which most New Zealand ISPs now do. IPv6 removes a layer of address translation and helps games and video calls set up direct connections, which lowers latency. MTU (the maximum packet size) only needs attention on PPPoE connections, where 1492 is the correct value because PPPoE adds eight bytes of overhead; on standard DHCP fibre connections, leave it at 1500. If your router offers MSS clamping on a PPPoE line, leave it enabled — it prevents the packet fragmentation that otherwise slows some sites.
Security settings that keep you fast
Security settings are speed settings in disguise, because a compromised router is a slow router — hijacked bandwidth, injected ads and mystery slowdowns all trace back to routers left wide open. Spend five minutes on the following:
- Keep firmware current. Turn on automatic updates or check monthly. Updates fix the bugs behind random dropouts as often as they patch security holes.
- Use WPA3, or WPA2/WPA3 mixed if an older printer or smart device will not otherwise connect. Never use WEP or run an open network. The standards body explains the difference at Wi-Fi security and WPA3 from the Wi-Fi Alliance.
- Turn WPS off. The push-button pairing feature has a long history of flaws and nothing modern needs it.
- Turn remote management off unless you genuinely use the maker’s app, and give the admin page a strong, unique password kept in a password manager rather than the default printed on the case.
- Turn UPnP off unless a game console needs it for an open NAT type; left on, it lets any device on the network open ports to the internet by itself.
- Run a guest network for visitors and smart-home gadgets, so a compromised smart plug or cheap camera cannot reach your laptop, phone or NAS.
The best settings for each NZ connection type
The right settings depend on what your connection is, because the bottleneck differs. A gigabit fibre home almost never runs out of connection capacity, so its slow spots are pure Wi-Fi; a Starlink, wireless-broadband or VDSL home has a modest upload that fills up easily, so managing the queue matters far more than the Wi-Fi channel. The table below is a starting point — always measure before and after.
Settings by Connection Type
| Connection | 2.4 GHz | 5 GHz | QoS / SQM | Key note |
|---|---|---|---|---|
| Fibre Max / Hyperfibre | Ch 1/6/11, 20 MHz | Auto, 80 MHz | Off | Slow spots are Wi-Fi, not the line; cable the demanding devices. |
| Fibre 300 | Ch 1/6/11, 20 MHz | Auto, 80 MHz | On if calls stutter (limits ~90–95% of measured) | Generous download, easily saturated upload. |
| VDSL copper | Ch 1/6/11, 20 MHz | Auto, 80 MHz | On (SQM), MTU 1492 for PPPoE | Small upload benefits most from smart queuing. |
| 4G / 5G wireless broadband | Ch 1/6/11, 20 MHz | Auto, 80 MHz | On (SQM) | Speed varies through the day; no setting fixes a busy tower. |
| Starlink | Ch 1/6/11, 20 MHz* | Auto or DFS, 80 MHz* | Use bypass + own router | Built-in router hides most controls; bypass mode restores them. |
* Requires Starlink bypass mode with your own router before you can set channels or QoS.
On Fibre Max and Hyperfibre, leave QoS off, get the channels right, and put anything demanding — a TV, a console, a work PC — on a cable where you can. On Fibre 300, the download is generous but the upload is easy to saturate, so smart-queue QoS is worth trying if calls stutter while someone uploads. On VDSL copper, set MTU to 1492 for PPPoE and use SQM to tame the small upload. On 4G/5G wireless broadband, expect the connection itself to vary through the day; SQM smooths calls, but no setting fixes a congested cell tower. On Starlink, the built-in router hides most of these controls, so use bypass mode with your own router if you want channel control or QoS. Gamers chasing lower ping should also read our gaming internet guide, which covers bufferbloat and realistic pings to Australia, the US and Asia.
Settings you can safely ignore
Plenty of settings look important but change nothing you can measure. Leave these alone:
- Beamforming, MU-MIMO and OFDMA toggles: leave them on. Turning them off never helps on current firmware.
- “Boost”, “turbo” and “game mode” buttons: usually a QoS preset with a friendlier name and no magic behind it.
- Hiding the SSID: it makes devices roam worse and hides nothing from anyone with a scanning app.
- MAC address filtering: tedious to maintain and trivial to bypass; a strong passphrase and a guest network do the same job better.
- DHCP range and lease tweaks: irrelevant to speed unless you have more devices than addresses.
Common mistakes people make
Most “I changed everything and it is still slow” stories come down to a short list of avoidable mistakes. Watch for these:
- Changing several settings at once. If you flip five switches and the speed changes, you have no idea which one did it — or which one made it worse. Change one thing, test, then move on.
- Testing over Wi-Fi from far away. A weak signal in the far bedroom will limit any speed test, so a poor result there tells you nothing about the connection. Test on a cable first to find the true ceiling.
- Leaving two routers routing. Adding a mesh or a second router without bridging the old one recreates double NAT and undoes the benefit.
- Setting QoS limits too high or leaving them at zero. Smart-queue QoS only works when the limit sits just under your real speed; set it to the plan’s advertised number and it never engages.
- Splitting the 2.4 GHz and 5 GHz networks into different names “for control”. This leaves phones stuck on the slower band and defeats band steering. Keep one name unless a specific smart device forces a split.
- Blaming settings for a coverage problem. If the signal cannot physically reach a room, no setting will conjure it there.
When no router setting helps
If the cabled speed is right but the Wi-Fi is still poor in some rooms after the channel changes, you have a coverage problem, not a settings problem — and no amount of tuning fixes distance and walls. The durable fix is a wired access point or a mesh Wi-Fi system that puts a strong signal where you actually use it; the cheap patch for a single dead room is a Wi-Fi extender, accepting that it roughly halves throughput on the extended link. Either way, place the main router centrally and out in the open before you spend anything, because a better position is free and often enough on its own.
Router settings names vary by brand and firmware version; the advice here was checked against current TP-Link, ASUS, Netgear and ISP-supplied routers in September 2026, and channel availability follows New Zealand’s radio rules. Nicegear is independent and carries no paid placements.
Sources
- Radio Spectrum Management NZ — 5 GHz Wi-Fi channels information leaflet (PDF)
- Radio Spectrum Management NZ — General User Radio Licence (GURL) notices
- NetSpot — Wi-Fi channel width explained
- Intel — Configure Wi-Fi channels and channel widths to improve performance
- CBT Nuggets — When to use 20 MHz, 40 MHz or 80 MHz Wi-Fi bands
Frequently asked questions (FAQ)
What is the best Wi-Fi channel in NZ?
On 2.4 GHz, use channel 1, 6 or 11 at 20 MHz width, whichever has the fewest strong neighbours. On 5 GHz, auto at 80 MHz suits most homes, or a DFS channel between 100 and 144 if you live somewhere dense, since most neighbours’ routers avoid those channels and leave them quiet.
Should I use 20, 40 or 80 MHz channel width?
Use 20 MHz on 2.4 GHz, always, because wider channels there overlap the whole band. Use 80 MHz on 5 GHz for almost every home. Try 160 MHz only in a quiet area with Wi-Fi 6 or Wi-Fi 7 devices, because it drops back to a narrower width the moment it detects interference.
Does changing DNS make the internet faster?
It can make pages start loading sooner if your ISP’s resolver is slow, but it does not change your download speed. Cloudflare (1.1.1.1) and Quad9 (9.9.9.9) both run servers in Auckland and are safe choices; set them on the router so every device benefits at once.
Should I turn on QoS?
Turn it on for Fibre 300, VDSL, wireless broadband or Starlink if calls and games stutter when others stream, using smart-queue QoS with limits at about 90–95 percent of your measured speed. Usually leave it off on Fibre Max and Hyperfibre, where a software QoS can cap your throughput for no gain.
How do I know if I have double NAT?
Check the WAN or internet address on your router’s status page. If it begins with 192.168, 10. or anything from 172.16 to 172.31, another router is sitting in front of it. Fix it by bridging the ISP router or setting your own router to access point mode so only one device routes.