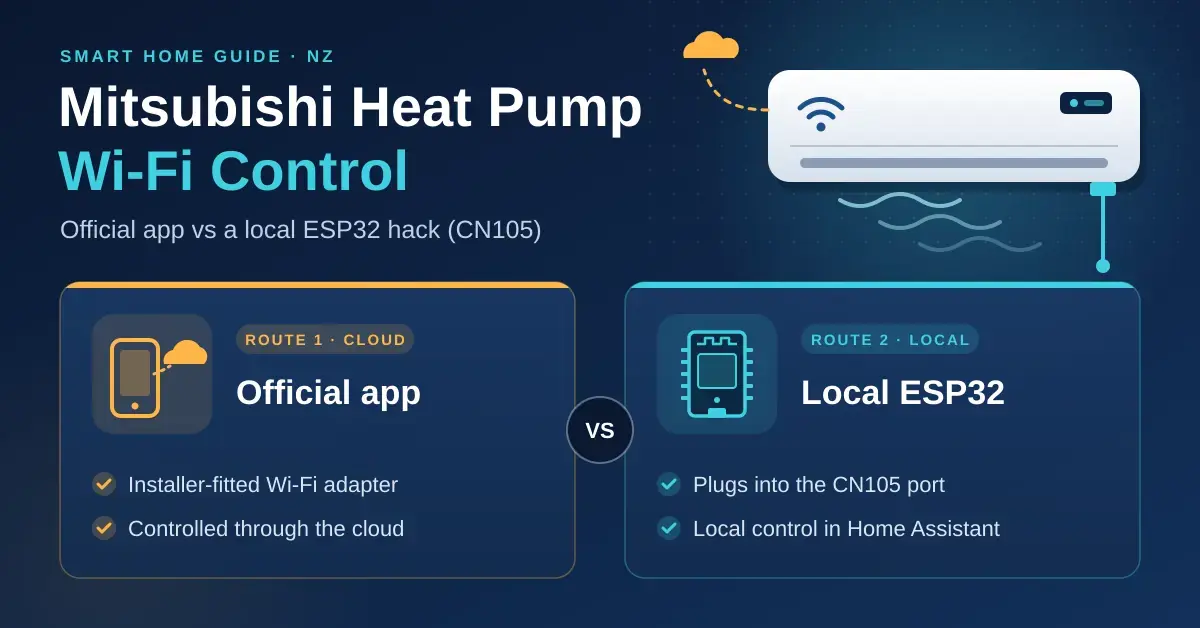
Mitsubishi heat pump Wi-Fi control is available two ways in New Zealand: Mitsubishi Electric’s own Wi-Fi Control adapter and app, fitted by an installer and run through the cloud, or a small ESP32 board plugged into the indoor unit’s CN105 port for local control in Home Assistant. This guide walks through both routes, adds infrared (IR) blasters as a third, no-tools option, and helps you match the right approach to your home — whether you own it, rent it or like to tinker.
The do-it-yourself route has a distinctly local backstory. In October 2016, Hadley Rich published “Hacking a Mitsubishi Heat Pump / Air Conditioner” on the original nicegear blog at this very address, documenting the CN105 serial port. Readers built on that work to create the SwiCago HeatPump library, which still credits the post in its acknowledgements. If smart homes are new to you, our home automation basics guide explains the building blocks first.
Key takeaways
- Official route: a Mitsubishi Electric Wi-Fi adapter such as the MAC-588IF-E (or Wi-Fi built into newer models) plus the Mitsubishi Wi-Fi Control app. It is installer-fitted, works with Alexa and Google Home, and needs the internet and a 2.4 GHz network.
- DIY route: an ESP32 on the CN105 port running the open-source MitsubishiCN105ESPHome component gives fast, two-way local control in Home Assistant, with no cloud.
- CN105 is a 5 V serial port (2400 baud, even parity). ESP32 pins are 3.3 V only, so a bidirectional logic level shifter is required.
- Opening the indoor unit exposes 230 V parts. Isolate the power first, and remember that Mitsubishi does not support third-party hardware.
- IR blasters need no modification, which suits renters, but they cannot confirm what the heat pump actually did.
How to connect a Mitsubishi heat pump to Wi-Fi: the official route
The official route is a Mitsubishi Electric Wi-Fi adapter plus the Mitsubishi Wi-Fi Control app, and it is the supported, no-soldering choice. Mitsubishi Electric NZ brands the system Wi-Fi Control. It works with the company’s domestic high-wall, floor console and ducted systems, and comes either built in on some newer models or as an adapter that plugs into the indoor unit. Current adapters include the MAC-588IF-E and MAC-578IF-E, while the older MAC-568IF-E, MAC-559IF-E and MAC-558IF-E are still in many homes. The MAC-588IF-E covers M Series, P Series and City Multi units manufactured from January 2015 onward. Mitsubishi says the adapter should only be installed by an authorised installer, so ask for a supplied-and-fitted price. Full compatibility and system requirements are on Mitsubishi Electric New Zealand’s Wi-Fi Control page, and the MAC-588IF-E Wi-Fi interface listing shows what a typical adapter looks like.
Quick facts
| Product | Mitsubishi Wi-Fi Control (adapter + app) |
| Developer | Mitsubishi Electric |
| Official app | Mitsubishi Wi-Fi Control — Google Play and the App Store |
| Cloud service | MELView (New Zealand and Australia) |
| Price | App is free; the Wi-Fi adapter and installation are sold separately |
| Adapter models | MAC-588IF-E, MAC-578IF-E (older: MAC-568IF-E, MAC-559IF-E, MAC-558IF-E) |
| Network | 2.4 GHz Wi-Fi, WPA2-AES, active internet connection |
| Platforms | iOS and Android; works with Amazon Alexa and Google Home |
- Check compatibility against Mitsubishi Electric’s model list, or ask your installer.
- Get the adapter fitted by an authorised installer, or confirm your model already has Wi-Fi built in.
- Install the Mitsubishi Wi-Fi Control app from the App Store or Google Play and create an account.
- Join it to your Wi-Fi. Mitsubishi requires a WPA2-AES router with the 2.4 GHz band switched on, plus an active internet connection.
- Add voice control if you want it: Wi-Fi Control works with Amazon Alexa and Google Home.
Indoor units often sit high on a wall at the far end of the house, where Wi-Fi is weakest. If the adapter keeps dropping out, improve coverage first — for example with a mesh Wi-Fi system — before blaming the heat pump.
Day to day, the app lets you turn the unit on and off, set the mode and target temperature, choose fan speed and vane direction, and build weekly schedules, all from anywhere with an internet connection. Because it is a cloud service, control is not instant the way a local system is — commands travel to Mitsubishi’s servers and back — but for most households the few seconds of lag is unnoticeable. The trade-off is dependence: if your broadband is down, or Mitsubishi’s cloud is having a bad day, the app cannot reach the heat pump even though your home network is fine.
MELView NZ vs MELCloud
Search for Mitsubishi heat pump apps and you will find two separate cloud services, which is the single most common source of confusion. The Mitsubishi Wi-Fi Control app used in New Zealand and Australia runs on Mitsubishi’s MELView service, while much of Europe uses MELCloud. The accounts are not interchangeable, which is why European guides — and Home Assistant’s built-in MELCloud integration — do not work with NZ units. Community-made MELView integrations for Home Assistant exist, but they rely on the same cloud service and can break whenever Mitsubishi changes it.
Mitsubishi CN105: how the local hack works
Inside most Mitsubishi indoor units, the control board carries a small five-pin socket labelled CN105, and tapping it is what makes fully local control possible. It is the same port the official Wi-Fi adapters plug into, and it speaks a simple serial protocol: 5 V TTL levels at 2400 bits per second with even parity. Because the link is two-way, the heat pump reports its real state — including changes you make with the handheld remote — so your app or dashboard never has to guess.
That two-way link is what Hadley’s 2016 project worked out with a logic analyser, bridging the heat pump to an MQTT broker from a Raspberry Pi. In the comments, a reader ported the protocol to an Arduino library that became the SwiCago HeatPump library. The geoffdavis/esphome-mitsubishiheatpump project later wrapped that library for ESPHome. When it was archived on 31 March 2025, its maintainer pointed users to Eric Chavet’s MitsubishiCN105ESPHome, which is today’s recommended component. You can still read the original 2016 nicegear blog post preserved on the Internet Archive. In under a decade, hacking a Mitsubishi heat pump has gone from a logic-analyser project to a few lines of YAML.
The CN105 pinout
The connector is a JST PA five-pin socket. Only three of its pins are used for a controller, but knowing all five helps you avoid wiring mistakes:
| CN105 pin | Signal | Use |
|---|---|---|
| 1 | 12 V | Not used |
| 2 | GND | Ground |
| 3 | 5 V | Can power the ESP32 board |
| 4 | TX | Data from the heat pump (5 V) |
| 5 | RX | Data to the heat pump (5 V) |
What you need for an ESP32 heat pump controller
- An ESP32 board. The MitsubishiCN105ESPHome project recommends ESP32 devices such as a generic ESP32 DevKit, an M5Stack ATOM Lite or ATOM S3 Lite, or a Seeed XIAO ESP32S3, and warns that ESP8266 boards tend to be unreliable here. Our Arduino vs ESP32 vs Raspberry Pi guide explains why the ESP32 suits jobs like this.
- A bidirectional logic level shifter. The heat pump side is 5 V and ESP32 pins are not 5 V tolerant, so never wire them directly — shift the TX and RX lines between 5 V and 3.3 V.
- A JST PA five-pin plug. The SwiCago README lists the PAP-05V-S housing with SPHD-002T-P0.5 crimp terminals; pre-crimped leads save fiddly hand-crimping.
- Somewhere to run ESPHome and Home Assistant, such as a Home Assistant Green or a mini PC.
ESPHome configuration
The component installs straight from GitHub as an ESPHome external component, so there is no manual library download. The key settings from the project’s own ESP32 DevKit example are:
- UART: a baud rate of 2400, with your board’s TX and RX pins set (for example GPIO17 and GPIO16 on a generic ESP32 DevKit).
- External component: point the source at “github://echavet/MitsubishiCN105ESPHome” so ESPHome pulls the code and its library automatically.
- Climate platform: the “cn105” platform, given a friendly name and an update interval of about two seconds.
Pin numbers depend on your board, so follow the README for your hardware. Once flashed and adopted, Home Assistant shows the heat pump as a climate device with mode, target temperature, fan speed and vane controls, updating within a couple of seconds. Everything stays on your own network, so it keeps working when the internet is down.
The modern component talks to Home Assistant over ESPHome’s native API, which is encrypted and needs no separate broker. Older setups based on the SwiCago library often published to an MQTT broker instead, and you can still do that if you prefer MQTT, but for most people the native path is simpler and more reliable. Because the control loop lives entirely on your ESP32 and your Home Assistant box, response is near-instant and automations keep running through an internet outage — the practical payoff that draws people away from the cloud app in the first place.
Mitsubishi heat pump Home Assistant options compared
The three routes differ most in feedback, internet dependence and who supports them. This table lays out the practical trade-offs side by side:
| Official Wi-Fi Control | ESP32 on CN105 | IR blaster | |
|---|---|---|---|
| Hardware | MAC-588IF-E adapter, or built in | ESP32, level shifter, JST PA lead | Smart IR hub, or an ESP32 with an IR LED |
| Fitting | Authorised installer | DIY, inside the indoor unit | Sits in the room, no wiring |
| Feedback | Two-way | Two-way, local | One-way, no confirmation |
| Works without internet | No | Yes | Usually, depending on the hub |
| Home Assistant | Community cloud integrations | Native, through ESPHome | Hub integration or ESPHome IR climate |
| Support | Mitsubishi Electric | Community only, at your own risk | Hub maker; heat pump untouched |
| Voice control | Alexa and Google Home | Through Home Assistant | Through the hub’s app |
Safety, warranty and renting
Isolate the power before you open anything. The CN105 socket carries only 5 V and 12 V, but it sits on a control board inside a unit wired to 230 V mains. Switch the heat pump off at its isolating switch (often mounted near the outdoor unit) and at the switchboard before removing any covers, and do not rely on the remote’s off button. If you are not confident working inside an electrical appliance, ask your installer to fit the official adapter instead.
Mitsubishi Electric does not support third-party boards on CN105, and the MitsubishiCN105ESPHome project itself describes the code as an unofficial, reverse-engineered implementation to use at your own risk. If a fault is ever traced to your add-on, do not expect warranty help; for that reason many owners wait until the warranty period has passed before fitting one. Renters should leave the heat pump alone: it is the landlord’s appliance, and an IR blaster gives you app control without touching it.
IR blasters: the no-screwdriver option
An IR blaster is the easiest route because it never touches the heat pump. A smart IR remote, such as a Broadlink or SwitchBot hub, learns or reproduces the codes your handheld remote sends, so you can control the unit from your phone and Home Assistant without opening anything. DIYers can do the same with an ESP32 and an IR LED using ESPHome’s IR climate component, which includes a Mitsubishi platform.
The weakness is that IR is one-way. The blaster needs line of sight, cannot tell whether the unit actually heard it, and loses track if someone picks up the real remote. For simple schedules that is often fine; for automations that depend on the true state of the heat pump, CN105 is the better choice.
In practice, place the hub where it can “see” the indoor unit — a shelf or wall on the same side of the room usually works, since the signal can bounce off walls and ceilings. A Broadlink or SwitchBot hub is the plug-and-play option and integrates with Home Assistant, Alexa and Google. The DIY ESP32-plus-IR-LED route costs a few dollars in parts and keeps everything local, but you may need to capture your remote’s exact codes if the built-in Mitsubishi profile does not match your model. Either way, keep the original handset handy: IR control supplements it rather than replacing it.
Common mistakes with heat pump Wi-Fi control
- Switching a heat pump with a smart plug. Heat pumps are hard-wired, and cutting their power is not a safe way to control them. Use Wi-Fi control or IR, and save smart plugs for plug-in appliances.
- A 5 GHz-only network. The official adapter and ESP32 boards both need the 2.4 GHz band switched on; a router set to 5 GHz only will never connect.
- Skipping the level shifter. Wiring 5 V serial lines straight to an ESP32 risks damaging the board and confusing the heat pump.
- Automations that fight people. A rule that resets the temperature every few minutes will override anyone using the remote; trigger on events such as arriving home instead.
- Heating an empty house. Wi-Fi control pays off when you schedule it: a heat pump is usually the biggest winter load, so pre-heat before you get home rather than leaving it running all day.
Our home energy monitoring guide shows how to measure what your heat pump actually uses, and for more gadgets that play nicely with Home Assistant, see our smart home devices guide.
Which route should you choose?
Pick by how you want to control the unit and how much work you will do. If you simply want to control your heat pump from your phone, the official Mitsubishi Electric Wi-Fi Control adapter is the sensible, supported choice, and newer models may already have it built in. If you run Home Assistant and are comfortable with basic electronics, an ESP32 with a level shifter on CN105, running MitsubishiCN105ESPHome, is faster, fully local and far more flexible. Renters, or anyone who would rather not open the unit, should use an IR blaster. Whichever you choose, isolate the power before opening a heat pump, and schedule heating rather than leaving it running.
Editorial note: Product details were checked against Mitsubishi Electric New Zealand and the community projects’ documentation in September 2026. The CN105 method is unofficial and carried out at your own risk. Nicegear is independent, sells nothing and carries no paid placements.
Sources
- Wi-Fi Control – Mitsubishi Electric New Zealand
- MAC-588IF-E Wi-Fi Interface – Mitsubishi Electric New Zealand
- Mitsubishi Wi-Fi Control – Google Play
- SwiCago/HeatPump Arduino library – GitHub
- echavet/MitsubishiCN105ESPHome – GitHub
- geoffdavis/esphome-mitsubishiheatpump (archived) – GitHub
- IR Remote Climate – ESPHome documentation
- Hacking a Mitsubishi Heat Pump / Air Conditioner (2016) – Internet Archive
Vanliga frågor (FAQ)
How do I connect my Mitsubishi heat pump to Wi-Fi?
Check that your model is compatible, have an authorised installer fit a Mitsubishi Electric Wi-Fi adapter such as the MAC-588IF-E (some newer models have Wi-Fi built in), then set it up in the Mitsubishi Wi-Fi Control app on a 2.4 GHz WPA2 network with an active internet connection.
What is the CN105 port on a Mitsubishi heat pump?
It is a five-pin JST PA connector on the indoor unit’s control board carrying 12 V, ground, 5 V and a two-way serial link at 2400 baud with even parity. Mitsubishi’s own Wi-Fi adapters use it, and so do community ESP32 controllers running MitsubishiCN105ESPHome.
Can I use Home Assistant with a Mitsubishi heat pump in NZ?
Yes. The most reliable way is local, with an ESP32 on the CN105 port running MitsubishiCN105ESPHome. Community-made MELView integrations also exist, but they depend on Mitsubishi’s cloud, and Home Assistant’s built-in MELCloud integration is for the European service, not the NZ one.
Will an ESP32 CN105 controller void my warranty?
Mitsubishi Electric does not support third-party hardware on CN105, so a fault caused by an add-on is unlikely to be covered. Check your warranty terms, and consider waiting until the warranty has expired before fitting one.
What is the difference between MELCloud and MELView?
Both are Mitsubishi Electric cloud services for Wi-Fi-connected heat pumps. MELView sits behind the Mitsubishi Wi-Fi Control app in New Zealand and Australia, while MELCloud is used in Europe, and the accounts are not interchangeable.