
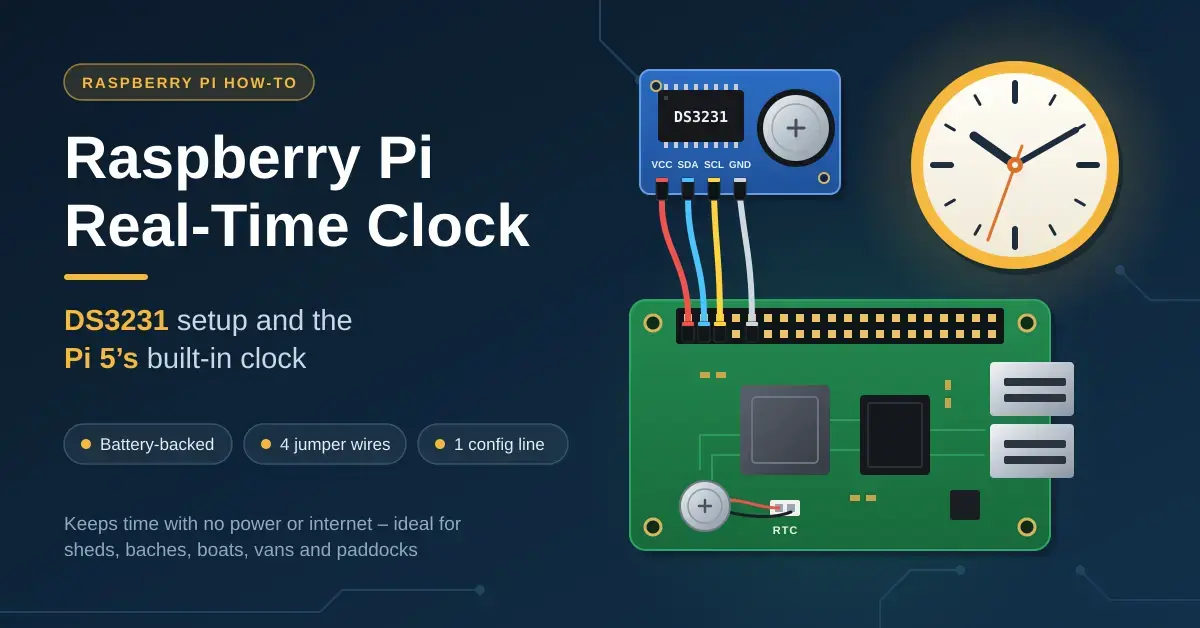
A real-time clock (RTC) is a small, battery-backed chip that keeps the date and time on a Raspberry Pi even when the board is switched off and has no internet. The Raspberry Pi 5 has one built into the board and only needs its roughly NZ$10 backup cell; a Pi 4, Pi 3 or Zero 2 W has no clock of its own and needs an add-on module such as the DS3231, which takes four jumper wires and a single line of configuration. This guide is written for Kiwi makers running a Pi in a shed, bach, boat, van or paddock, where mains power and the internet both come and go.
If you are brand new to the boards themselves, our Raspberry Pi explainer is the place to start, and if you are still choosing between platforms, see Arduino vs ESP32 vs Raspberry Pi. Everything below has been checked against Raspberry Pi’s own documentation and the Raspberry Pi OS releases (Bookworm and Trixie) shipping in 2026, so the file paths and commands match what you will actually see on a current install.
Key takeaways
- Raspberry Pi 5: plug the official RTC battery (SC1163, about NZ$10 at PB Tech) into the J5 connector; charging stays off until you add one config line.
- Older Pis (4, 3, Zero 2 W): a DS3231 module is the best add-on, rated ±2 ppm — about a minute a year — from 0 to 40 °C.
- Power any module from 3.3 V (pin 1), never 5 V, using header pins 1, 3, 5 and 6.
- On current Raspberry Pi OS (Bookworm and Trixie) the overlay line goes in /boot/firmware/config.txt, not /boot/config.txt.
- The RTC always stores UTC; Raspberry Pi OS applies NZ daylight saving through the Pacific/Auckland time zone.
Why a Raspberry Pi loses track of the time
Most Raspberry Pi boards ship without a battery-backed clock. While it is running, a Pi counts time with its own oscillator and nudges it back into line from internet time servers (NTP) using the systemd-timesyncd service. The moment the power stops, that count stops too, and the board has no way to remember where it had got to.
To stop a Pi booting with a wildly wrong date, Raspberry Pi OS has long relied on fake-hwclock — a small service that writes the current time to a file every hour and again at shutdown, then reads it back at the next boot. It keeps the date roughly sane, but it cannot count the hours the Pi spent switched off: a board that was powered down for a week with no internet wakes up still believing it is a week ago. That matters more than it first sounds:
- Data loggers, weather stations and a DIY home energy monitor record their readings against the wrong timestamps.
- Scheduled jobs — from simple cron tasks to Home Assistant automations — fire at the wrong moment, or not at all.
- HTTPS, TLS and VPN connections can fail outright, because certificates look as though they are not yet valid or have already expired.
- Logs on a Pi home server become almost impossible to line up after an outage.
A real-time clock fixes all of this at once. It is a dedicated chip with its own quartz crystal and a backup battery, so it keeps counting the seconds even when the rest of the board has no power at all.
Raspberry Pi 5 RTC battery: using the built-in clock
The Pi 5 is the first mainstream Raspberry Pi with a real-time clock on the board itself, and it is by far the easiest route. The clock runs for free while the Pi has power, but to keep time when the board is unplugged it needs a backup cell on the J5 (BAT) connector — a small two-pin socket in the corner of the board, just to the right of the USB-C power input. Raspberry Pi covers the feature in its Real Time Clock (RTC) documentation.
Which battery to fit
Use the official Raspberry Pi RTC Battery (part SC1163): a rechargeable ML2020 lithium-manganese coin cell with a pre-fitted two-pin JST plug and an adhesive pad for mounting. PB Tech listed it at NZ$10.32 including GST in 2026. The official RTC battery product page is explicit that it is a rechargeable cell. Do not substitute a lithium-ion battery or an ordinary non-rechargeable lithium coin cell such as a CR2032: the Pi 5’s clock draws more backup current than a dedicated RTC chip, and the board is designed to trickle-charge a rechargeable ML2020, not to sit connected to a primary cell.
Turn on battery charging
Charging is switched off by default, so a brand-new rechargeable cell will slowly go flat unless you enable the trickle charger. Add one line to the firmware config file — the full list of options lives in the config.txt reference:
# Open the firmware config file
sudo nano /boot/firmware/config.txt

# Add this line at the end, under [all], then save and reboot
dtparam=rtc_bbat_vchg=3000000

# After the reboot, confirm the charge voltage and read the clock
cat /sys/class/rtc/rtc0/charging_voltage
sudo hwclock -r
The charging_voltage file should read 3000000 (three volts, expressed in microvolts), which is the level at which the charger tops the cell up and then holds it. With a charged battery in place, a Pi 5 comes back from a power cut already showing the correct time — no network needed, and nothing extra to install.
Waking a halted Pi 5 on a timer
The same clock can switch a halted Pi 5 back on at a set time, which is ideal for solar-powered cameras and loggers that only need to run for a few minutes each hour. Our solar panel and battery calculator helps you size the panel and battery for a duty cycle like that.
# Ask the RTC to power the Pi back on 600 seconds (10 minutes) after it halts
echo +600 | sudo tee /sys/class/rtc/rtc0/wakealarm
sudo halt

# Optional: lowest-power halt, set once in the bootloader EEPROM
sudo -E rpi-eeprom-config --edit
#   then add or change these two lines:
POWER_OFF_ON_HALT=1
WAKE_ON_GPIO=0
Setting POWER_OFF_ON_HALT=1 drops the board into its lowest-power state when you halt it, so the wake alarm draws almost nothing in between runs — the difference that makes a solar logger practical.
Fitting a DS3231 to a Pi 4, Pi 3 or Zero 2 W
Every Raspberry Pi other than the Pi 5 needs an external clock, and the DS3231 is the one to buy. It has a temperature-compensated crystal built into the chip, rated by Analog Devices in the DS3231 datasheet at ±2 ppm between 0 and 40 °C — roughly one minute a year. Bare modules are cheap and stocked by NZ hobby-electronics suppliers, while an RTC HAT plugs straight onto the first ten header pins. Many of these boards are open-source hardware designs with published schematics.
Step 1: Wire the module (four wires)
With the Pi switched off, connect four jumper wires between the module and the GPIO header:
| DS3231 pin | Raspberry Pi pin | Signal |
|---|---|---|
| VCC | Pin 1 | 3.3 V power |
| SDA | Pin 3 | GPIO 2 (I2C data) |
| SCL | Pin 5 | GPIO 3 (I2C clock) |
| GND | Pin 6 | Ground |
Always take power from pin 1 (3.3 V), never from a 5 V pin. Most DS3231 modules have pull-up resistors on the SDA and SCL lines tied to their own supply, so powering the board from 5 V would push 5 V back into the Pi’s 3.3 V I2C pins and can damage them over time.
Step 2: Enable I2C and find the chip
sudo raspi-config nonint do_i2c 0
sudo apt update
sudo apt install -y i2c-tools util-linux-extra
sudo i2cdetect -y 1
The first command switches on the I2C interface (the same setting as Interface Options in raspi-config), and the install line adds i2cdetect and hwclock in case they are missing. The final command prints a grid of addresses: you should see 68, which is the DS3231. Many cheap modules also show 57, a small EEPROM memory chip on the same board that you can safely ignore. A completely empty grid means the wiring is wrong.
Step 3: Load the kernel driver
Since Raspberry Pi OS Bookworm, the firmware configuration lives in /boot/firmware/config.txt, not the older /boot/config.txt that many tutorials still reference. Add the i2c-rtc device-tree overlay with the ds3231 parameter — the full set of overlays is documented in the Device Tree overlays README:
sudo nano /boot/firmware/config.txt

# Add this line at the end, under [all], then save
dtoverlay=i2c-rtc,ds3231

sudo reboot

# After the reboot, address 68 should now read UU
sudo i2cdetect -y 1
ls /dev/rtc*
After the reboot, address 68 changes to UU, which means the kernel driver has claimed the chip, and a /dev/rtc0 device appears. For a different clock, simply swap the parameter — pcf8523, ds1307 and many others are listed in that same overlays README.
Step 4: Set the clock with hwclock
A brand-new module does not know the time yet. Let the Pi fetch the correct time from the internet once, then copy it across into the RTC. The hwclock manual page documents every option:
timedatectl        # wait until it says: System clock synchronized: yes
sudo hwclock -w    # write the system time into the RTC
sudo hwclock -r    # read the RTC back to check
You only need to do this once. If the Pi is usually online, running sudo hwclock -w occasionally keeps the RTC within a second or two of true time. The clock stores UTC, which is exactly what Raspberry Pi OS expects.
Step 5: Make the Pi read the RTC at every boot
This is the step older guides get wrong on current releases. Tutorials written for Raspbian Jessie and Buster tell you to edit /lib/udev/hwclock-set, but that script is missing on some current installs (including Trixie-based ones) and, where it does exist, it exits early on systemd systems unless you edit it. Writing your own one-line udev rule is simpler and depends only on udev and hwclock:
# Remove the stand-in clock (harmless if it is not installed)
sudo apt purge -y fake-hwclock

# Copy the RTC time into the system clock whenever the RTC appears at boot
echo 'ACTION=="add", SUBSYSTEM=="rtc", KERNEL=="rtc0", RUN+="/sbin/hwclock --rtc=/dev/rtc0 --hctosys --utc"' | sudo tee /etc/udev/rules.d/85-rtc-hctosys.rules

sudo reboot
To prove it works, shut the Pi down, disconnect Ethernet and Wi-Fi, wait a few minutes, then power it up and run date or timedatectl. The time should already be correct before the Pi has any chance to reach an internet time server.
DS1307 vs DS3231 vs PCF8523: which I2C RTC to choose
All three chips are common on cheap modules, but they are not equal on a Raspberry Pi. The table below compares the realistic options, with the Pi 5’s built-in clock for reference.
RTC comparison
| Clock | Accuracy | Supply voltage | Verdict for a Pi |
|---|---|---|---|
| DS3231SN | ±2 ppm, 0–40 °C (about 1 minute a year) | 2.3–5.5 V | Best choice: accurate and happy on 3.3 V |
| DS3231M | ±5 ppm (MEMS resonator) | 2.3–5.5 V | Good; slightly less accurate than the SN |
| PCF8523 | Set by its crystal, typically ±20 ppm | Runs at 3.3 V | Fine for casual projects |
| DS1307 | Set by its crystal; ±20 ppm or worse | 4.5–5.5 V | Avoid: a 5 V part |
| Pi 5 built-in | Not published by Raspberry Pi | Board power plus ML2020 cell | Easiest if you already have a Pi 5 |
Accuracy is easier to picture as drift over time. A DS3231 rated at ±2 ppm gains or loses at most about 0.17 seconds a day, so it is still within roughly five seconds after a full month with no internet. A crystal-based DS1307 or PCF8523 at a typical ±20 ppm can drift ten times as far — close to a minute a month at room temperature, and further still in a cold shed or a hot roof space, because an uncompensated 32.768 kHz crystal speeds up and slows down with temperature. As a rule of thumb, one part per million works out to about 2.6 seconds a month.
For anything where timestamps have to line up, the DS3231 is easily worth the extra dollar or two. The cheaper chips are fine for casual projects that reach the internet often enough to correct themselves between runs.
Time zones and NZ daylight saving
The RTC should always hold UTC, never local time. Raspberry Pi OS converts UTC to local time using the configured time zone, so set that to Pacific/Auckland (or Pacific/Chatham on the Chatham Islands) and let the operating system do the rest:
sudo timedatectl set-timezone Pacific/Auckland
You can also set it through Localisation Options in raspi-config. With the time zone correct, New Zealand daylight saving is handled automatically every year — clocks move forward to NZDT (UTC+13) on the last Sunday of September and back to NZST (UTC+12) on the first Sunday of April — and the RTC itself never needs adjusting.
If your Pi is ever out by exactly 12 or 13 hours, the RTC was written in local time by mistake. Put it back onto UTC with:
sudo timedatectl set-local-rtc 0
sudo hwclock -w
How to check the RTC is keeping time
Two commands tell you almost everything. timedatectl shows the system clock, the RTC time and whether network time sync is active, all at once, while sudo hwclock -r reads the RTC chip directly:
timedatectl
sudo hwclock -r
date
In normal use the RTC and system times should match to within a second or two. The real test, though, is a cold-boot test: with the module set, shut the Pi down, pull the network, leave it off for as long as it realistically might be in the field, then power it back up offline and check date. If it comes up correct, the clock, the driver and the boot-time rule are all doing their jobs. If it is only a second or two out after a long spell offline, that is normal drift, corrected the next time the Pi reaches the internet. If it is minutes or hours out, work through the troubleshooting list below.
Common mistakes and how to fix them
Most RTC problems come down to a handful of recurring mistakes. Work down this list before assuming a faulty module:
- i2cdetect shows an empty grid: I2C is not enabled, or SDA and SCL are swapped. Re-check pins 3 and 5, and confirm the interface is switched on.
- Address 68 appears but never turns into UU: the overlay line is missing, misspelt, or sitting under a section such as [cm4] or [pi4] that does not apply to your board. Put dtoverlay=i2c-rtc,ds3231 under [all] at the end of the file.
- hwclock says it cannot access the hardware clock: the driver has not loaded, or hwclock is not installed. Install util-linux-extra and check that /dev/rtc0 exists.
- The time is right until the first reboot without internet: the boot-time udev rule from Step 5 is missing, or fake-hwclock is still installed and overwriting the RTC time.
- Powering the module from 5 V: a common and risky shortcut. Use pin 1 (3.3 V) so the module’s pull-up resistors do not feed 5 V into the Pi’s I2C pins.
- Time wrong after months in storage: the backup cell is flat. Some cheap DS3231 boards include a charging circuit meant for a rechargeable LIR2032; if you fit a standard, non-rechargeable CR2032 to one of those, follow the seller’s advice, as many makers deliberately disable that circuit.
- A Pi 5 forgets the time when unplugged: the battery is missing, or charging was never enabled and the cell has run down. Fit the SC1163 and add the dtparam line above.
Finally, remember what an RTC is for. It keeps good time between internet syncs; it is not a precision reference. For time-critical scientific logging, the next step up is a GPS receiver with a pulse-per-second output feeding chrony, which can discipline the clock to well under a millisecond.
Who actually needs a Raspberry Pi RTC
You need one whenever a Pi has to know the correct time without a reliable internet connection. If your Pi lives on a desk with always-on fibre, the built-in NTP sync is usually enough and an RTC is optional. Add a clock when the Pi is off-grid or on intermittent power; when it logs data with timestamps that must line up; when it runs scheduled automations; when it records CCTV footage that has to be dated correctly; or when it acts as a server whose logs and certificates must stay valid through an outage. On a Pi 5, fit the official battery and enable charging. On any older board, a DS3231 wired to 3.3 V is the reliable choice.
About this guide: the steps and prices reflect Raspberry Pi’s own documentation and the Raspberry Pi OS releases (Bookworm and Trixie) current in 2026, when NZ prices were last checked; command paths and defaults can change with future OS updates. Nicegear is independent, sells nothing here and has no paid placements.
Sources
Frequently asked questions
Does the Raspberry Pi have a real-time clock?
The Raspberry Pi 5 does, and it keeps time when unplugged once you fit the rechargeable RTC battery to its J5 connector. The Pi 4, Pi 3 and Zero boards have no clock of their own, so they need an add-on module such as a DS3231 to keep time while switched off and offline.
What battery does the Raspberry Pi 5 RTC use?
Raspberry Pi recommends its official RTC battery, part SC1163, a rechargeable ML2020 lithium-manganese cell with a two-pin JST plug. Enable charging by adding dtparam=rtc_bbat_vchg=3000000 to /boot/firmware/config.txt, and avoid lithium-ion or non-rechargeable coin cells such as a CR2032.
How can a Raspberry Pi keep time without internet?
Fit a real-time clock: the built-in one on a Pi 5 with its battery, or a DS3231 module on older models. The Pi then reads the correct time from the RTC at boot and only needs the internet to correct small amounts of drift.
Is the DS3231 better than the DS1307?
For a Raspberry Pi, yes. The DS3231 runs happily on 3.3 V and has a built-in temperature-compensated crystal rated at ±2 ppm, while the DS1307 is a 5 V chip whose accuracy depends on an external crystal that drifts far more with temperature.
Does a Raspberry Pi RTC handle daylight saving?
It does not need to. The RTC stores UTC, and Raspberry Pi OS applies New Zealand daylight saving through the Pacific/Auckland time zone, moving the clock to NZDT and back automatically. Just make sure the time zone is set correctly.