
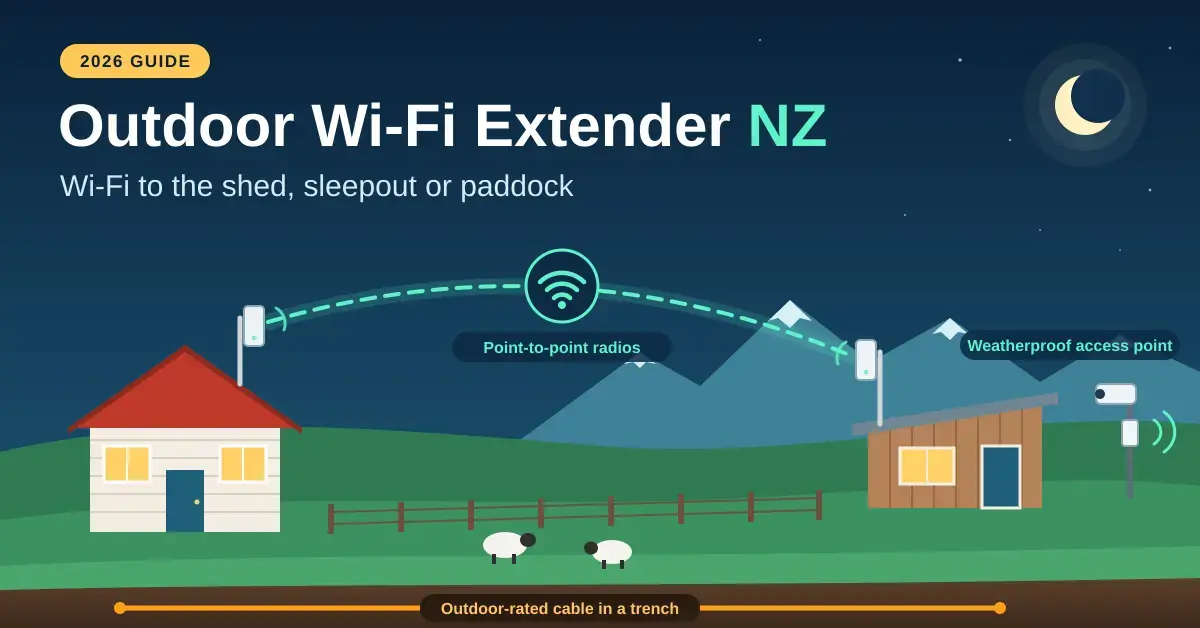
Getting Wi-Fi out to a sleepout, a garage, a workshop or a paddock camera is the one home-networking job where the usual advice falls over. A plug-in extender on a windowsill, a mesh node carried into the shed, or a long indoor patch lead trailed out a door all lose the fight against distance, weather and building cladding. The gear that actually works outdoors in New Zealand, though, is inexpensive and mostly plug-and-play: outdoor-rated cable in a trench, a matched pair of point-to-point radios, or a weatherproof access point bolted to the house. This guide explains which approach suits your distance and layout, what each costs in 2026, and how to install it so it survives a Canterbury nor’wester and a wet Waikato winter.
If your trouble spot is inside the house rather than beyond it, start with our Wi-Fi extender guide or our mesh Wi-Fi guide instead, because a full outdoor link is overkill for a cold bedroom at the end of the hall.
Key Takeaways
- Under 90 m and you can dig: bury outdoor-rated Cat6 in conduit and put an access point or mesh node in the outbuilding. Full speed, no aiming, about NZ$350–$500.
- Further, or no trench: a point-to-point link with two matched 5 GHz radios (about NZ$220–$300 a pair) carries 100–450 Mbps across a paddock or driveway with clear line of sight.
- Deck, pool and garden: a weatherproof access point on the house wall, cabled back to the router, covers the yard and nearby cameras.
- Skip the shortcuts: indoor extenders by a window and mesh nodes inside a steel-clad shed rarely work — cladding, Low-E glass and distance beat them.
- Protect the ends: fit earthed Ethernet surge protectors at both ends of any cable between buildings. Lightning and mains faults travel down data cable.
Why indoor Wi-Fi gear fails outdoors
A home router is built to cover a house through plasterboard, not to punch through two exterior walls and reach a shed 40 metres away. Modern New Zealand homes make the job harder still. Low-E (low-emissivity) glass, now standard in new builds and many double-glazing retrofits, carries a fine metallic coating that reflects Wi-Fi almost as effectively as it reflects heat, so a node parked “by the window” is often worse than one in the middle of the room. At the far end, corrugated steel cladding, foil-faced building wrap and concrete block reflect and soak up the signal all over again.
Distance lands the final blow. The fast 5 GHz band fades quickly in open air, and 2.4 GHz — which travels further — arrives weak and slow. Outdoor equipment beats these problems with three things ordinary gear lacks: weatherproof housings rated IP65 or better (dust-tight and protected against jets of water), directional antennas that concentrate the signal in one direction instead of spraying it everywhere, and higher permitted transmit power. Under New Zealand’s general user radio licences for short range devices, the 5725–5875 MHz band allows up to roughly 4 watts EIRP — effective isotropic radiated power, the combined strength of the transmitter and its antenna — which is what lets point-to-point radios span a paddock, or several kilometres, legally and licence-free.
Three ways to get Wi-Fi to an outbuilding
There are only three approaches worth your money, and the right one is decided almost entirely by distance and whether you can run a cable. Buried Ethernet is the fastest and most reliable option if you can dig; a wireless bridge jumps the gaps a trench cannot reach; and an outdoor access point on the house covers the deck, the pool and a nearby timber sleepout. The table below sets them side by side before we work through each one in detail.
Comparison
| Option | Distance | Speed at the far end | NZ cost (Sept 2026) | Watch out for |
|---|---|---|---|---|
| Buried outdoor Cat6 + access point or mesh node | Up to 90 m | Full plan speed | NZ$350–$500 incl. cable, conduit, surge protectors and AP | Digging; keep clear of power and water services |
| Point-to-point wireless bridge (two radios) | 50 m to several km | 100–450 Mbps | NZ$220–$300 a pair, plus an AP in the shed | Needs clear line of sight; trees grow |
| Outdoor access point on the house | Up to about 30 m in the open | Good near the house, fading with distance | NZ$250–$400 | Will not get through steel cladding on the far building |
| Indoor extender by a window | 10–15 m if lucky | Poor and variable | NZ$90–$200 | Low-E glass and cladding; usually disappoints |
How to plan your outdoor link
Before buying anything, measure three things: the distance from the house to the outbuilding, whether the two ends have clear line of sight, and what will actually use the connection out there. Those three answers point straight at one of the three options, and getting them wrong is the main reason people end up with a drawer full of extenders that never worked.
Distance and whether you can dig
Distance is the first filter. Anything up to about 90 metres where you can trench or clip a cable along a fence should be cabled — that is the practical run length for Ethernet at full speed. Beyond 90 metres, or where a driveway, a boundary or a tenancy rules out digging, a wireless bridge becomes the sensible choice. A short hop of under 30 metres to a timber building can often be covered by an outdoor access point on the house instead, with no work at the far end at all.
Line of sight
Line of sight decides whether a wireless bridge will work at all. Two directional radios need to “see” each other; a clear view across open ground is ideal, a few trees or a fence will cost you speed and reliability, and a building or a hill in the way will block the link entirely. If the two ends cannot see each other, you either mount a relay radio on a pole or a corner of the house that both can see, or you find a cable route. Cabling wins whenever it is possible.
What the outbuilding needs
What runs at the far end sets the speed you need. A phone, a laptop and the odd smart plug are happy on almost anything. Security cameras or a TV want a steady 20–50 Mbps and, ideally, wired power. A home office with video calls and gaming wants the lowest, steadiest latency you can get, which nudges you towards a cable even when a bridge would technically do the job. Match the option to the heaviest thing that will use it, not the lightest.
Option 1: Buried cable and an access point
For any outbuilding within about 90 metres where a trench is possible, cable wins on speed, reliability and cost over the life of the building. Use outdoor-rated Cat6 — either UV-stable direct-burial cable or gel-filled cable — inside 20–25 mm conduit buried around 300 mm deep, and keep it well clear of power and water services. Terminate on keystone jacks at each end, and fit an earthed Ethernet surge protector at both buildings; it is the one part people skip and the one that saves the router in a storm.
In the outbuilding, a Power-over-Ethernet access point such as the TP-Link Omada EAP610-Outdoor (about NZ$266 at PB Tech in September 2026) mounted under an eave covers the building and the yard around it, powered down the same cable from a PoE switch in the house. For a sleepout that only needs indoor coverage, a spare mesh node or any indoor access point on the cable does the job. Add a small switch out there for cameras, a TV or a workshop PC; our network switch guide covers PoE power budgets, and our Ethernet cable guide explains the cable grades and how far each one runs.
Option 2: Point-to-point wireless bridge
A wireless bridge is two directional radios, one on each building, aimed at each other to replace the cable rather than the access point. The far radio plugs into a short Cat6 run to an access point or mesh node inside the outbuilding, so devices out there join your normal Wi-Fi network. Ubiquiti’s NanoStation Loco5AC (about NZ$104 each) handles a few hundred metres with ease and several kilometres with clear line of sight; the LiteBeam 5AC Gen2 (about NZ$143 each) adds a dish antenna for longer or trickier paths. TP-Link’s Pharos CPE510 range is the simpler-to-configure alternative and ships as a pre-paired pair for short home runs.
Setting up a bridge
Set one radio as the access point and the other as the station, both on the 5.8 GHz band, with WPA2 security and the default channel width, and point each one at the other. Most kits walk you through this in a phone app in a few minutes; if you want to understand the settings, Ubiquiti’s guide to configuring a point-to-point link is the reference for the airMAX gear. Power matters too: most of these radios use 24 V passive PoE injectors supplied in the box, so do not plug them into a standard 802.3af/at PoE switch unless the model’s spec sheet lists it, or you can damage the radio.
Realistic speeds
Expect 100–450 Mbps across a clean 5 GHz link, which is more than most rural connections deliver to the house in the first place. Line of sight is everything: mount both radios high enough to clear fences, vehicles and future plantings, because a link that threads through trees works on a dry day and drops out when the leaves are wet. If the house itself is on Starlink, our Starlink Wi-Fi guide covers the bypass-mode setup that keeps a single network across the property.
Option 3: Outdoor access point on the house
For the deck, the pool, driveway cameras and a timber sleepout within about 30 metres, a weatherproof access point on an exterior wall or under an eave is the tidiest fix. Ubiquiti’s U6 Mesh and U7 Outdoor, TP-Link’s EAP610-Outdoor, and the outdoor Deco and eero mesh units all suit the job. Run a cable to the access point from the house if you possibly can, because an outdoor node on wireless backhaul roughly halves its own throughput before a single device connects. Aim it at the area you want to cover rather than at the sky, and keep it off metal cladding, which blocks everything behind it.
What this option cannot do is push signal into a steel shed across the paddock — the cladding stops it at the wall. If the far building is steel, colour-steel or concrete, treat it as a bridge job with a radio and a small access point mounted inside. If you are running cameras out there, wire them: once you have a cable or bridge into the outbuilding, add a small PoE switch and cable the cameras rather than relying on Wi-Fi ones, so they record continuously and never drop off. Our outdoor security camera guide covers the models and mounting.
What it costs in New Zealand (2026)
An outdoor Wi-Fi project costs between roughly NZ$250 and NZ$500 for most homes, and the wireless options are usually cheaper than people expect. The table below is a realistic parts budget in New Zealand dollars including GST, based on PB Tech pricing in September 2026 and assuming you do the labour yourself; prices move often, so treat them as a guide rather than a quote.
| Setup | Main parts | Typical NZ$ (incl GST) |
|---|---|---|
| Buried Cat6 + outdoor AP (up to ~50 m) | Outdoor Cat6, conduit, two surge protectors, PoE access point | $350–$450 |
| Buried Cat6 + outdoor AP (~90 m) | As above with a longer cable run | $400–$500 |
| Point-to-point bridge + AP inside | Two NanoStation Loco5AC (~$104 each) plus an access point in the shed | $300–$450 |
| Long bridge + AP inside (>1 km) | Two LiteBeam 5AC Gen2 (~$143 each) plus an access point in the shed | $380–$520 |
| Outdoor AP on the house | One weatherproof access point, cabled back to the router | $250–$400 |
Installation rules for New Zealand conditions
A few installation habits are what separate a link that lasts a decade from one that fails in the first big storm. None of them are optional if the cable or radios run between two buildings.
- Fit surge protection at both ends of any cable between buildings, earthed to each building’s earth. Lightning is uncommon in much of New Zealand, but mains faults and static are not, and a data cable is a direct path into your switch and router.
- Use outdoor-rated cable only. Standard PVC jackets go brittle in UV within a few years; choose UV-stable or gel-filled cable, and run it in conduit underground.
- Leave drip loops and seal your glands. Loop the cable below any entry point so water drips off rather than tracking inside, and seal the connectors on outdoor radios with the supplied rubber boots.
- Mount for wind. Pole and wall brackets should be rated for the gear; a dish that shifts two degrees in a gale loses the link completely.
- Keep data and power apart in the trench and the wall, as the AS/NZS 3000:2018 Wiring Rules require, and leave any mains work to a registered electrician.
- Use one router only. The outbuilding gets an access point or a mesh node, never a second router, or you create double NAT and break device-to-device connections; our home network setup guide shows the clean layout.
Common mistakes to avoid
Most outdoor Wi-Fi failures come from a handful of predictable mistakes rather than bad luck. Knowing them in advance saves a return trip to PB Tech.
- Trusting an indoor extender by the window. Low-E glass, cladding and distance leave it almost nothing to repeat. It is the cheapest option and the one most likely to disappoint.
- Ignoring line of sight. A bridge aimed through a shelterbelt or a growing hedge works in summer and drops out the first wet, windy week. Mount high and keep the path clear.
- Skipping surge protection. A NZ$30 protector at each end is cheaper than any router, switch or radio it saves. Skipping it is the single most expensive shortcut here.
- Using wireless backhaul for an outdoor node when a cable was possible. Half your speed disappears before the first device connects.
- Putting a second router in the shed. That creates double NAT and breaks cameras, casting and remote access. Use an access point or mesh node instead.
- Assuming a rural line is the bottleneck. On a fixed-wireless or satellite connection — whether that is Starlink or a provider like Wireless Nation — the link to the house is often slower than a well-aimed bridge, so a 300 Mbps bridge to a lifestyle block outside a town like Wānaka will rarely be the weak point.
Who each option suits
The right answer is mostly about your distance and whether you can dig, so match your situation to one of these before you spend anything.
- Dig if you can. A buried Cat6 run to a PoE access point in the outbuilding is the fastest, cheapest-over-time and least fiddly answer under 90 metres, and it never drops out in bad weather.
- No trench, or a longer distance? A NanoStation Loco5AC pair plus an access point inside the shed comes in around NZ$350 and runs for years, provided it has clear line of sight and a solid mount.
- Just the yard and a close timber sleepout? An outdoor access point on the house is the tidy fix — but not for a steel shed across the paddock, which needs a bridge.
- Heavy use out there — office, gaming, continuous cameras? Cable it if there is any way to, and wire the cameras to a small switch rather than putting them on Wi-Fi.
Prices in this guide are in NZ$ including GST as listed by PB Tech in September 2026 and change frequently. Distances and speeds are indicative and depend on line of sight, mounting and interference. Follow the wiring rules for anything near mains cabling, and use a registered electrician for mains work. Nicegear is independent and carries no paid product placements.
Sources
Frequently Asked Questions (FAQ)
How do I get Wi-Fi to my sleepout or shed?
If the building is within about 90 metres and you can dig, bury outdoor-rated Cat6 in conduit and put an access point or mesh node inside; that gives full speed and never drops out. If you cannot trench, or the distance is greater, use a pair of point-to-point radios aimed at each other with an access point inside the outbuilding.
How far can an outdoor Wi-Fi extender reach?
An outdoor access point covers roughly 30 metres of open yard well. A point-to-point bridge with directional radios reaches from about 50 metres to several kilometres with clear line of sight, typically delivering 100–450 Mbps depending on distance, aiming and interference.
Can I just use a normal Wi-Fi extender by the window?
It rarely works. Low-E window coatings, exterior cladding and plain distance leave the extender with almost no signal to repeat, so it either fails to connect or repeats a slow, unreliable link. Purpose-built outdoor gear costs about the same and is designed for the job.
Do I need line of sight for a point-to-point link?
Yes, for a reliable 5 GHz link. Trees, fences, vehicles and buildings in the path degrade or break it, and foliage is worst when wet. Mount both radios high enough to see each other, or use a relay on a pole or a corner of the house that both ends can see.
Is it legal to run a wireless bridge in New Zealand?
Yes. Consumer point-to-point radios operate under New Zealand’s general user radio licence for short range devices, which permits up to about 4 watts EIRP on the 5.8 GHz band with no individual licence or fee. Buy gear set to the New Zealand region and leave the transmit power at its default.
Do I need surge protection on an outdoor Ethernet cable?
Yes, at both ends, earthed to each building’s earth. A cable between two buildings is a direct path for lightning and mains faults into your switch and router, and a protector costs less than any single device it protects. It is the cheapest insurance in the whole install.